

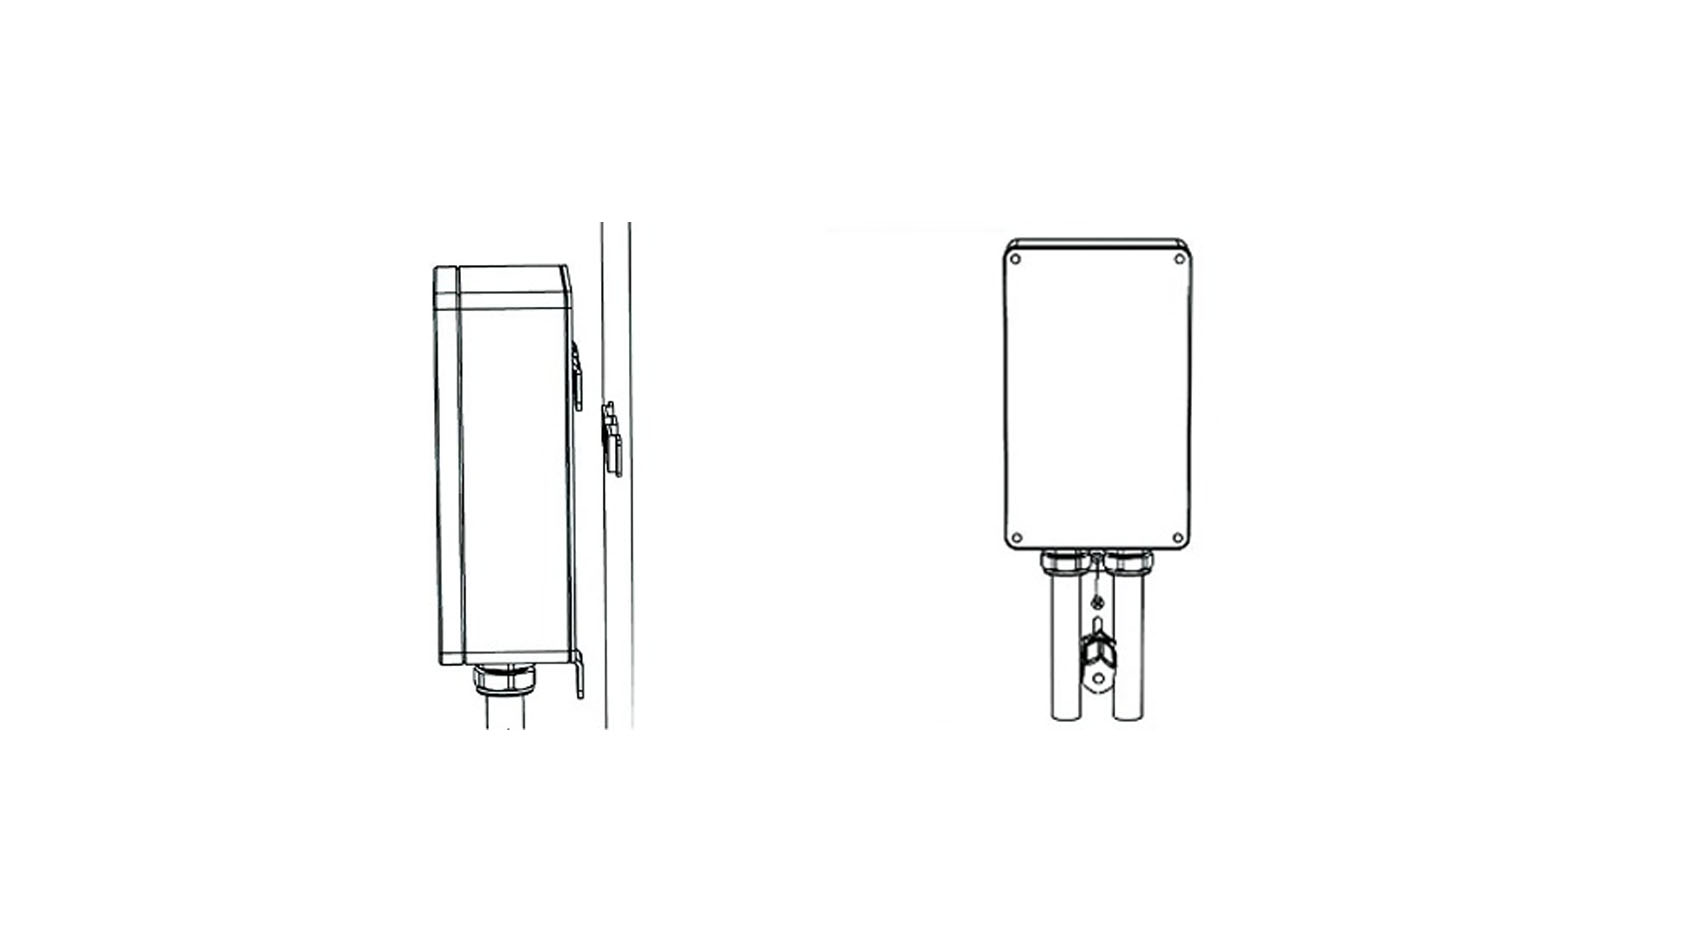
4. Hang the Waybox onto the wall bracket.
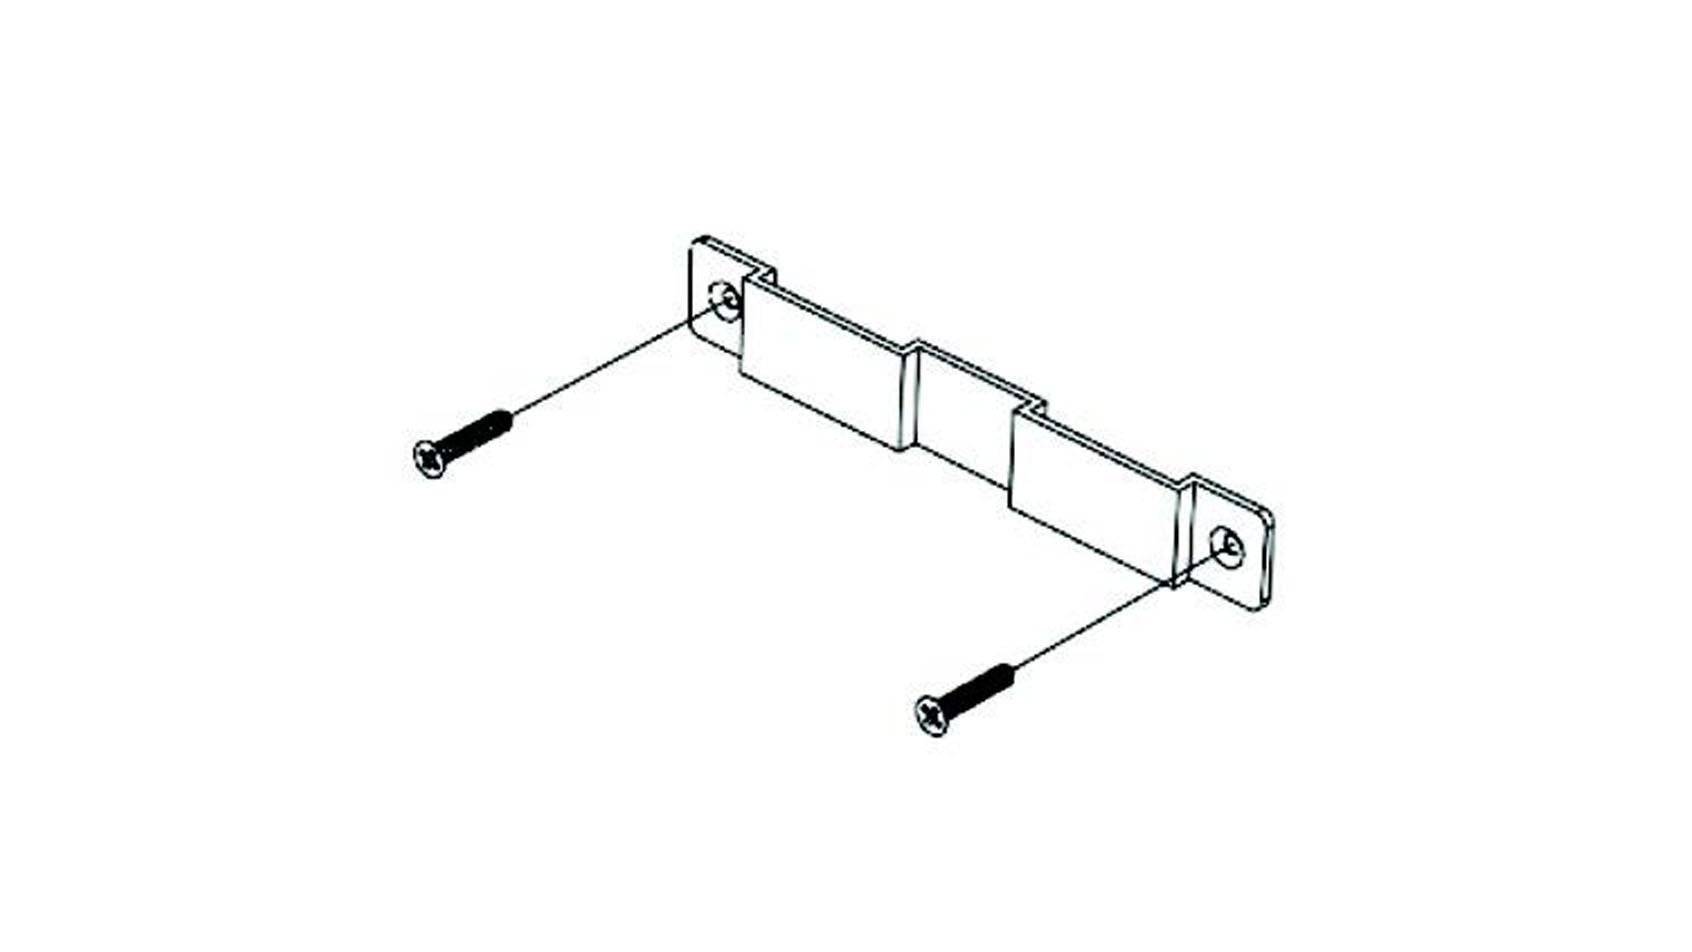
5. Optional: Use a wall screw (x1) to secure the bottom of the enclosure bracket to the wall
6. Connect the Waybox to the hardwired connection:
1-Phase Connection
|
Brown
|
Black
|
Grey
|
Blue
|
Green or Green/Yellow
|
|---|---|---|---|---|
|
L1
|
Not connected. Isolate and terminate.
|
Not connected. Isolate and terminate.
|
Neutral
|
Earth
|
|
Brown
|
Black
|
Grey
|
Blue
|
Green or Green/Yellow
|
|---|---|---|---|---|
|
L1
|
L2
|
L3
|
Neutral
|
Earth
|
7. Turn on the circuit breaker that supplies power to the Waybox. Wait 10 seconds.
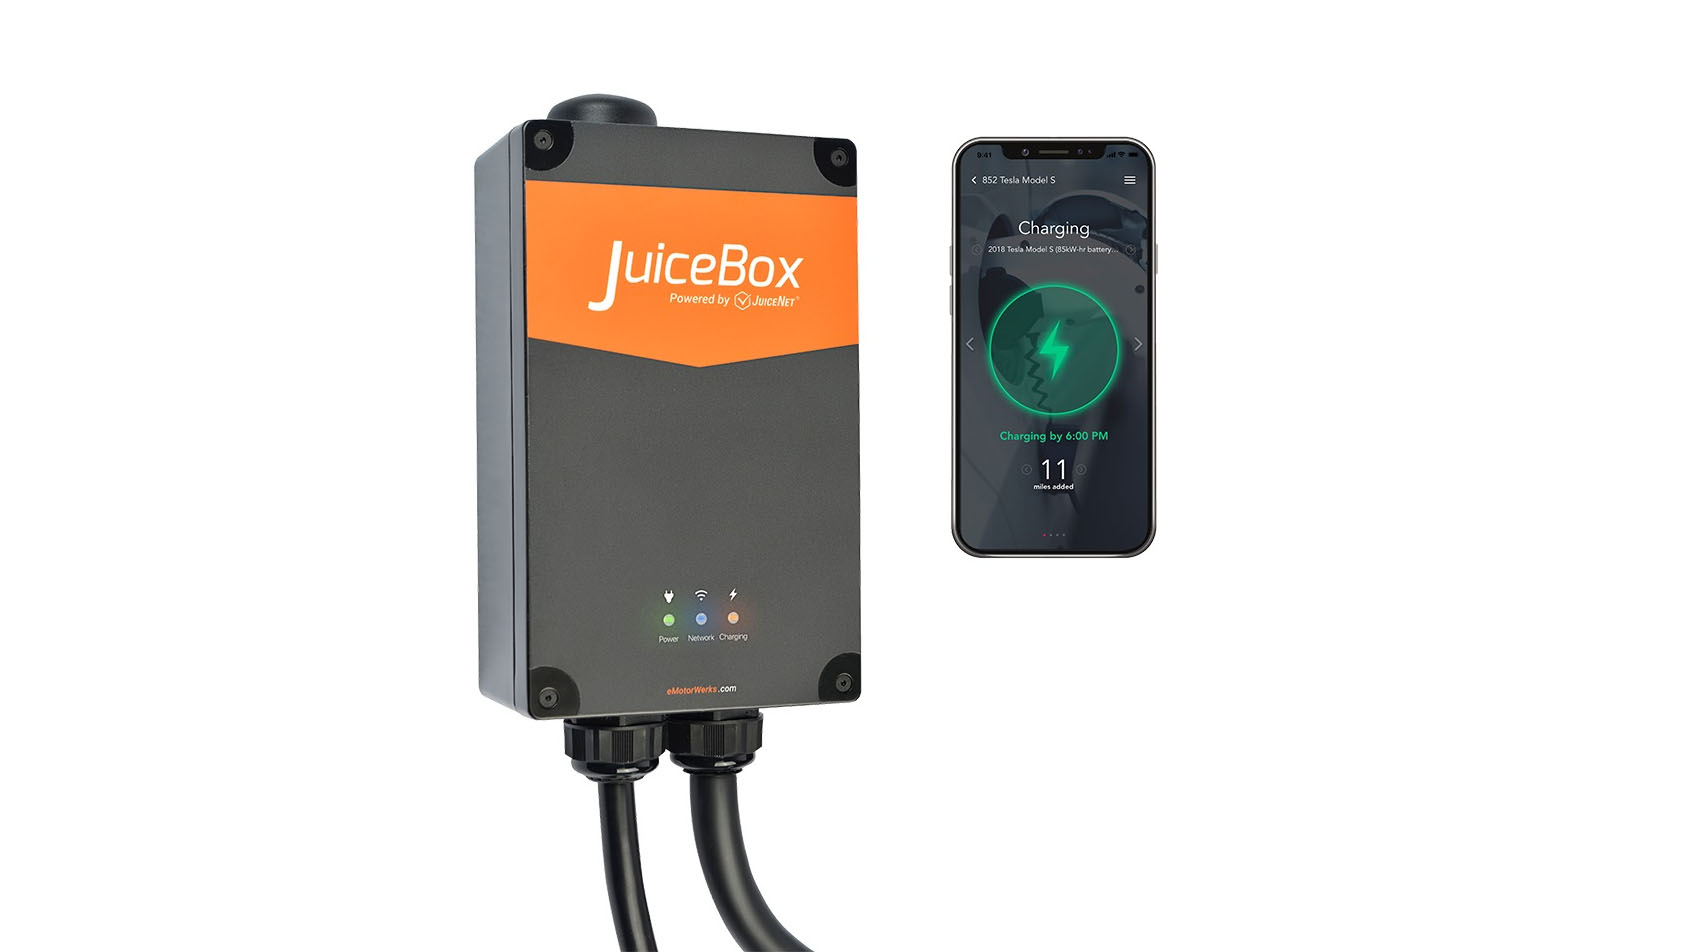
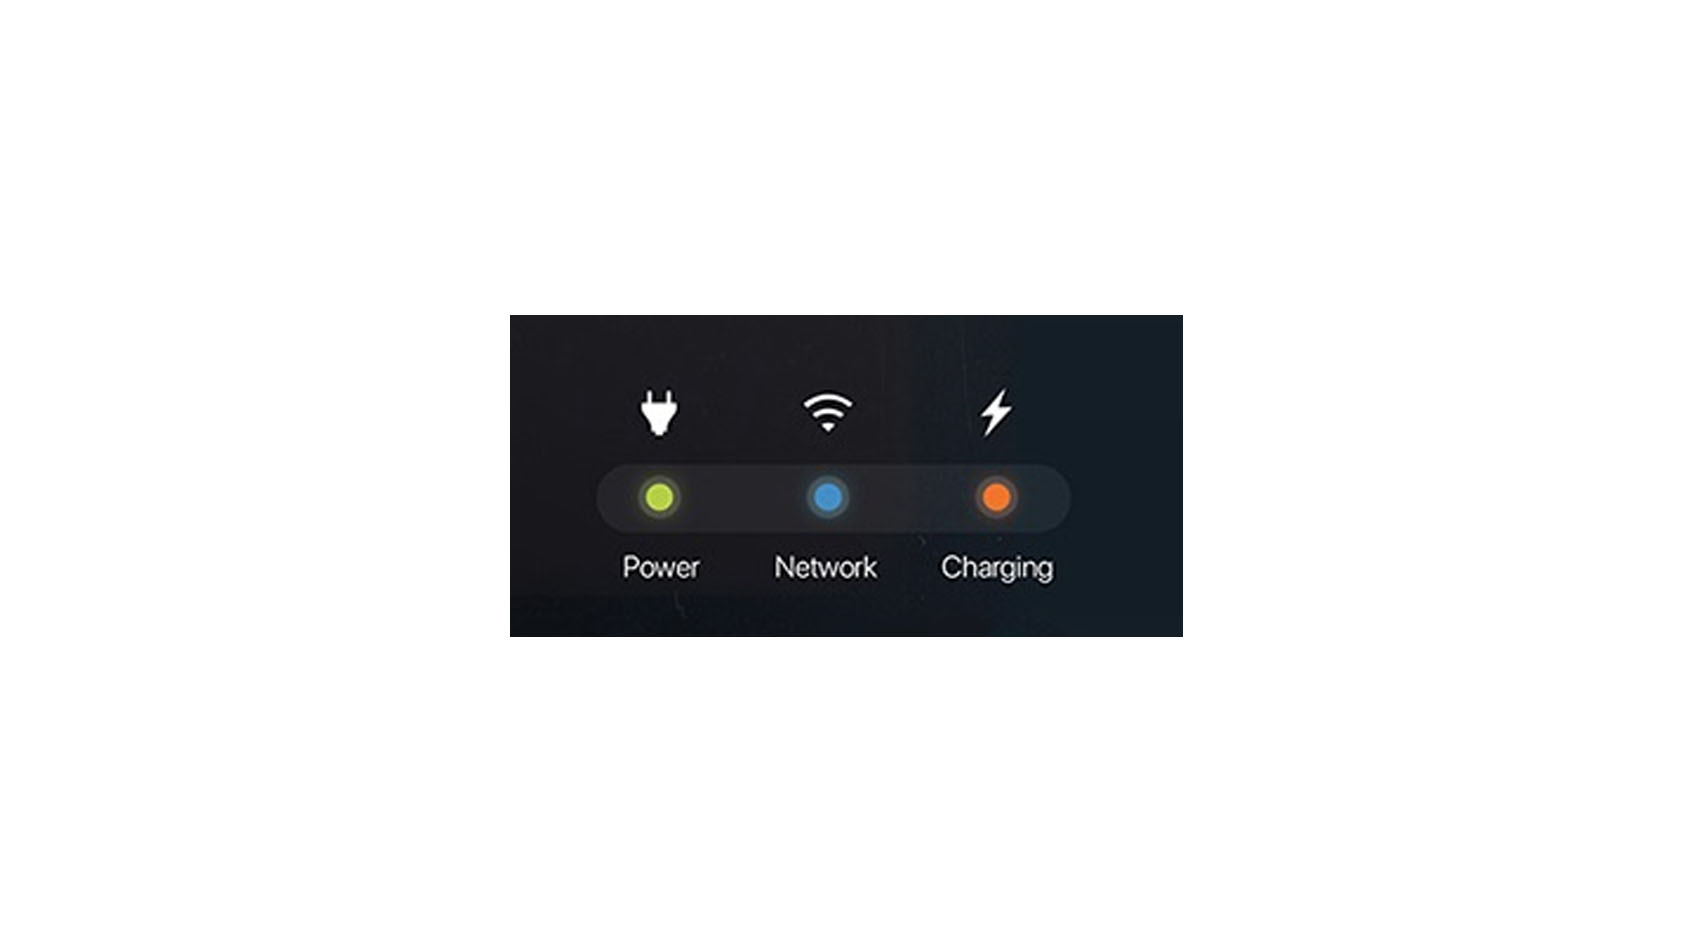
Verify that the Waybox is powered by checking that the "Power" indicator light on the enclosure is solid green.
8. Install the charging cable holder.
NOTE: Mount to wood, a stud, or use concrete or dry wall anchors.
6. Connect power to the Waybox. In the app, select Next.
NOTE: After powering the Waybox, steps 7 through 10 must be completed within 2 minutes.
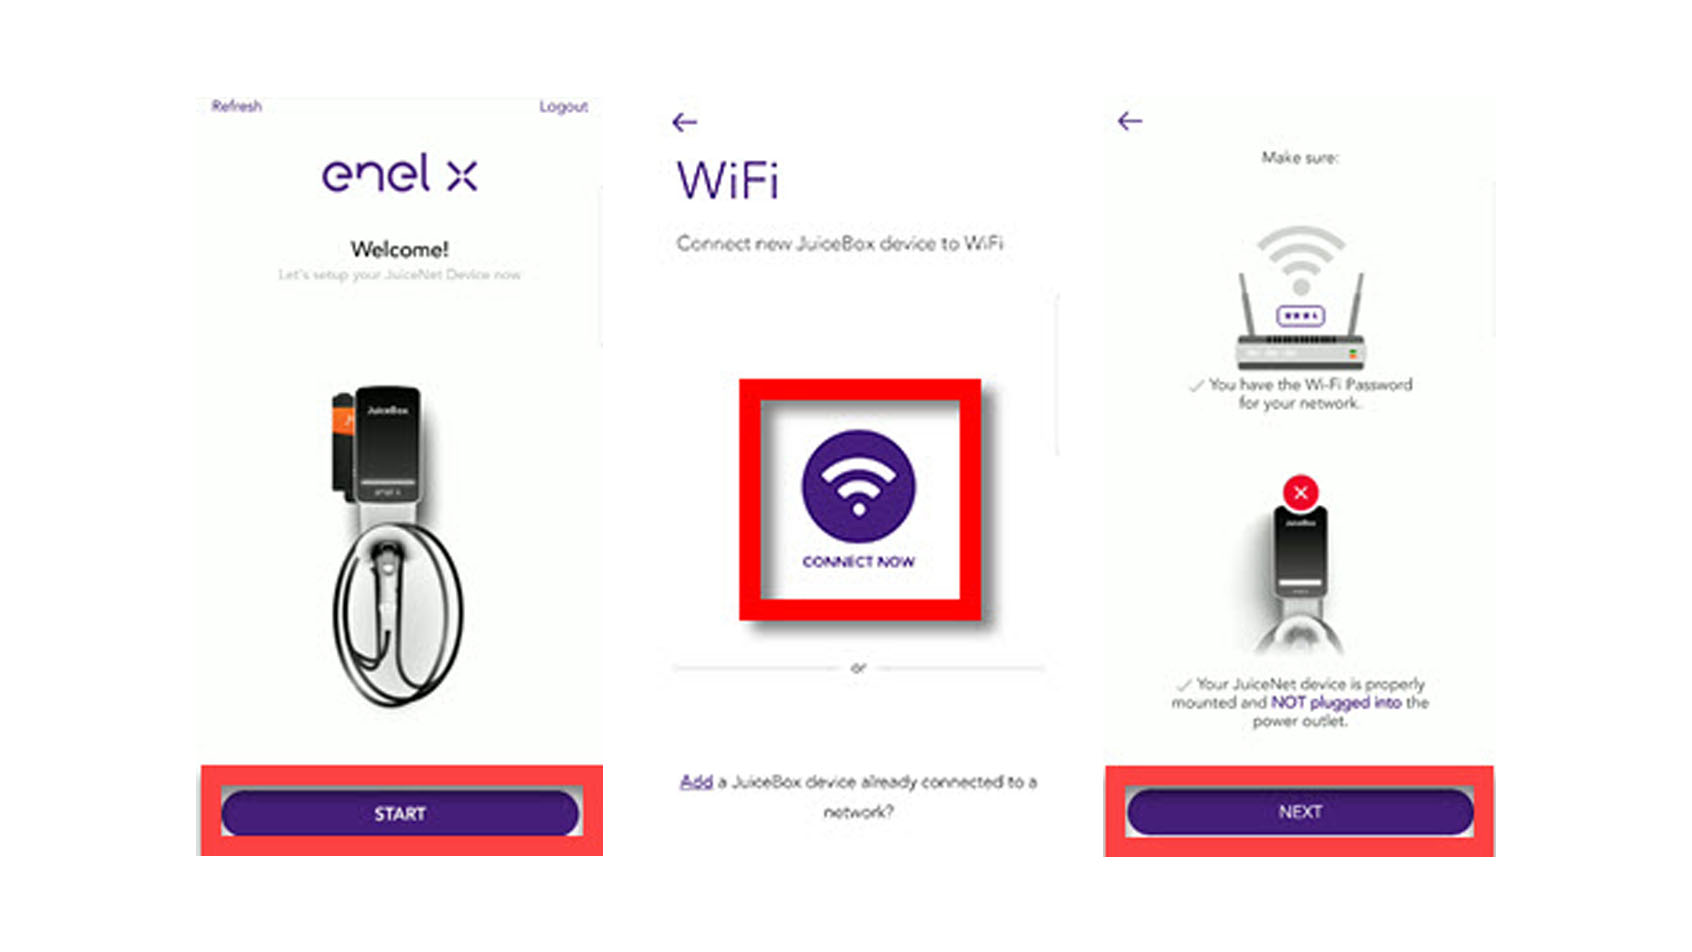
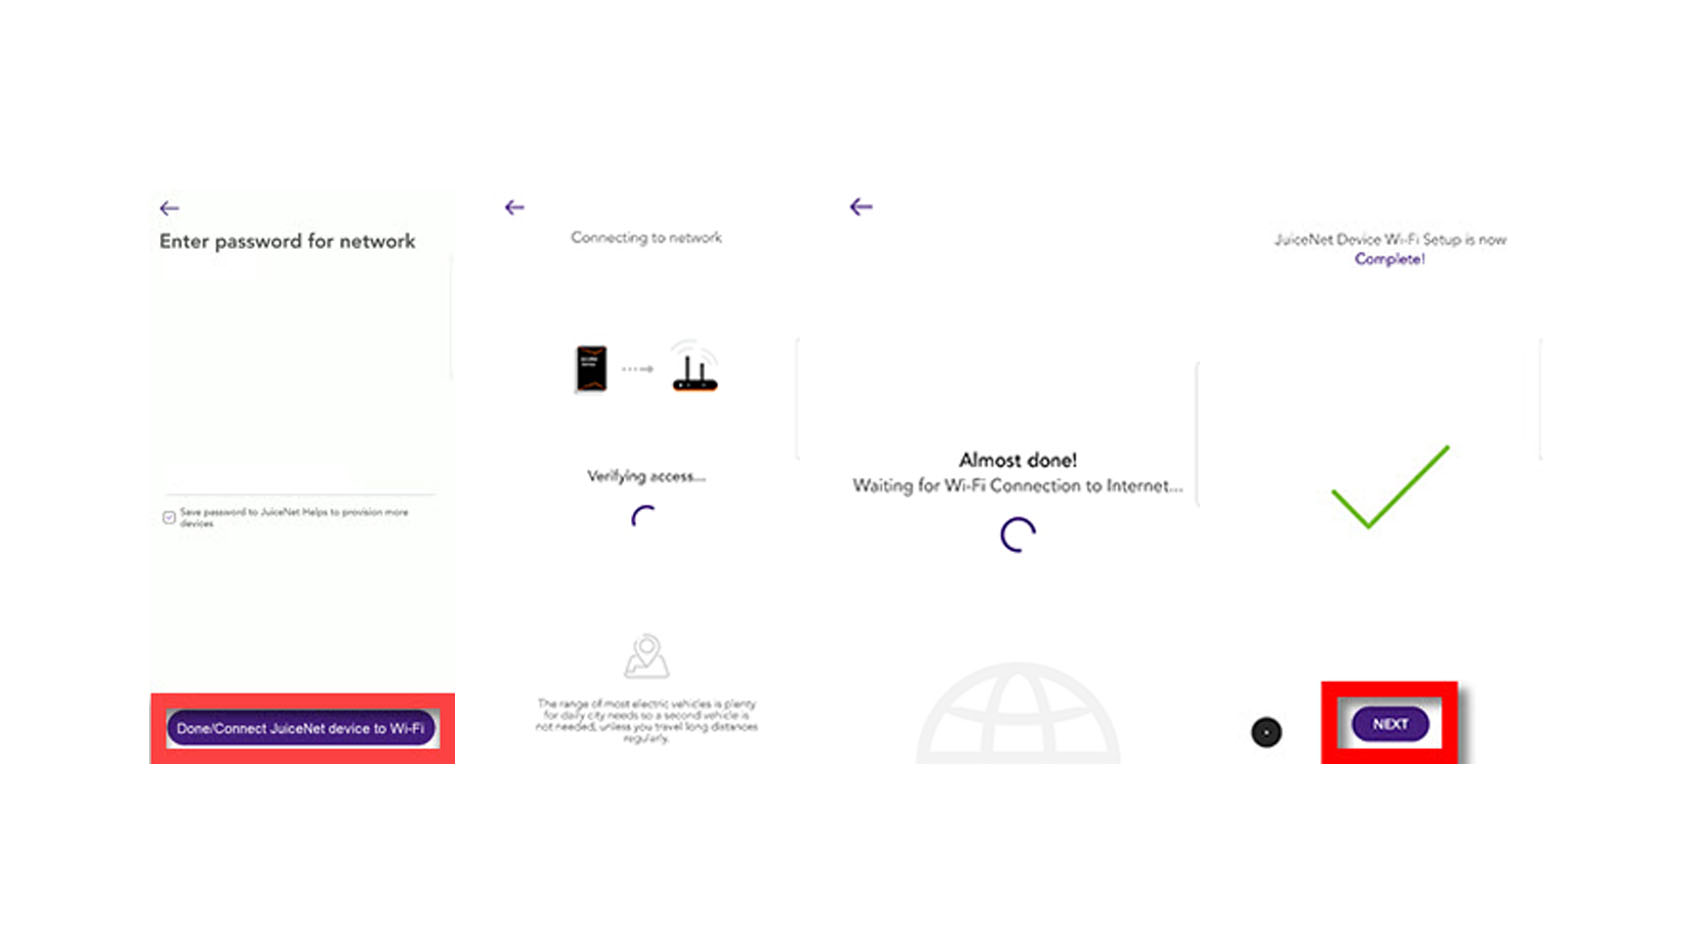
7. Navigate to the WiFi settings on your mobile device. Connect to the "Waybox-###" or "JuiceNet-###" WiFi network. If the network requires a password, use the password "GoElectric" (case-sensitive).
NOTE: The actual name of the network varies by device, such as "Waybox-123".
8. Return to the EV JuiceNet app.
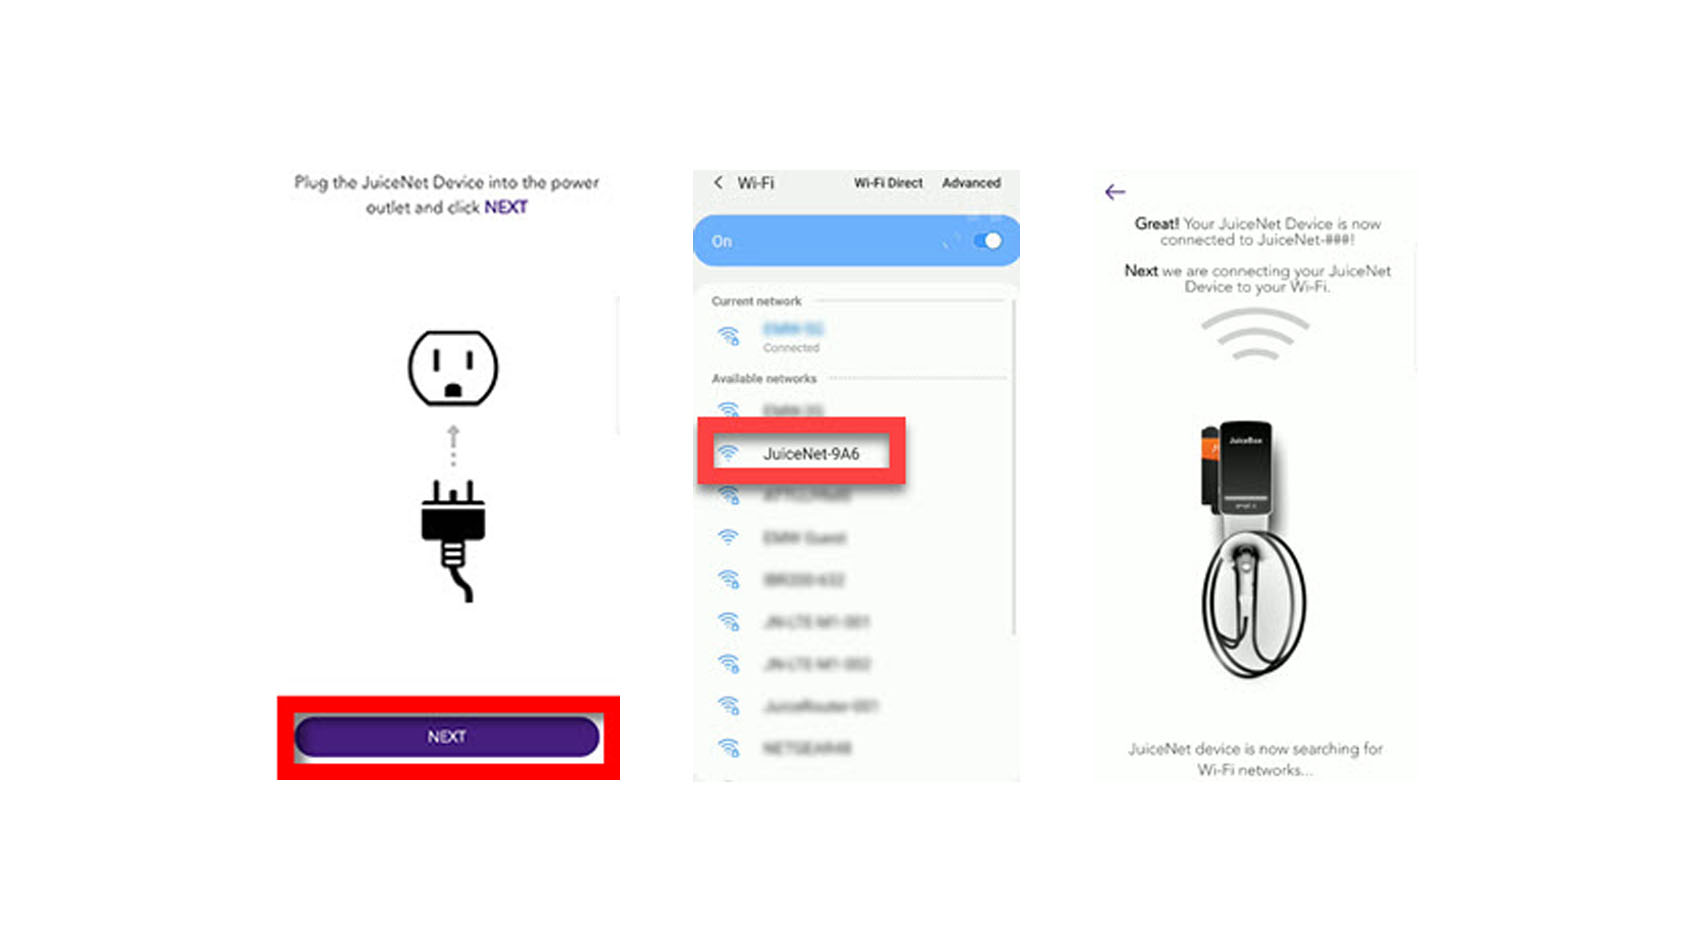
9. In the EV JuiceNet app, select the preferred local WiFi network.
10. Enter the WiFi network password, if necessary, then select Done / Connect JuiceNet device to Wi-Fi.
NOTE: If prompted, verify the password, then select Done / Password is correct.
The app connects the Waybox to the WiFi network.
11. After the app confirms that WiFi setup is complete, select Next to continue to the app home screen.
NOTE: After connecting, Waybox checks its firmware version and performs any necessary updates. Wait 10 minutes before plugging in a vehicle.
NOTE: Customize your experience by following the onscreen app instructions to select your vehicle and charging profile, or navigate to the JuiceNet dashboard on a personal computer at https://home.juice.net.
WiFi Setup - Personal Computer
Connect to WiFi
- Turn off the circuit breaker for the Waybox, then turn it back on.
NOTE: The following steps must be completed within 2 minutes of turning on the circuit breaker for the Waybox.
- Open the WiFi settings on your personal computer. Connect to the "Waybox-###" or "JuiceNet-###" WiFi network using the password "GoElectric" (case-sensitive).
NOTE: The actual name of the network varies by device, such as "Waybox-123".
- In a web browser, navigate to 10.10.10.1 or to setup.com to view a list of available WiFi networks.
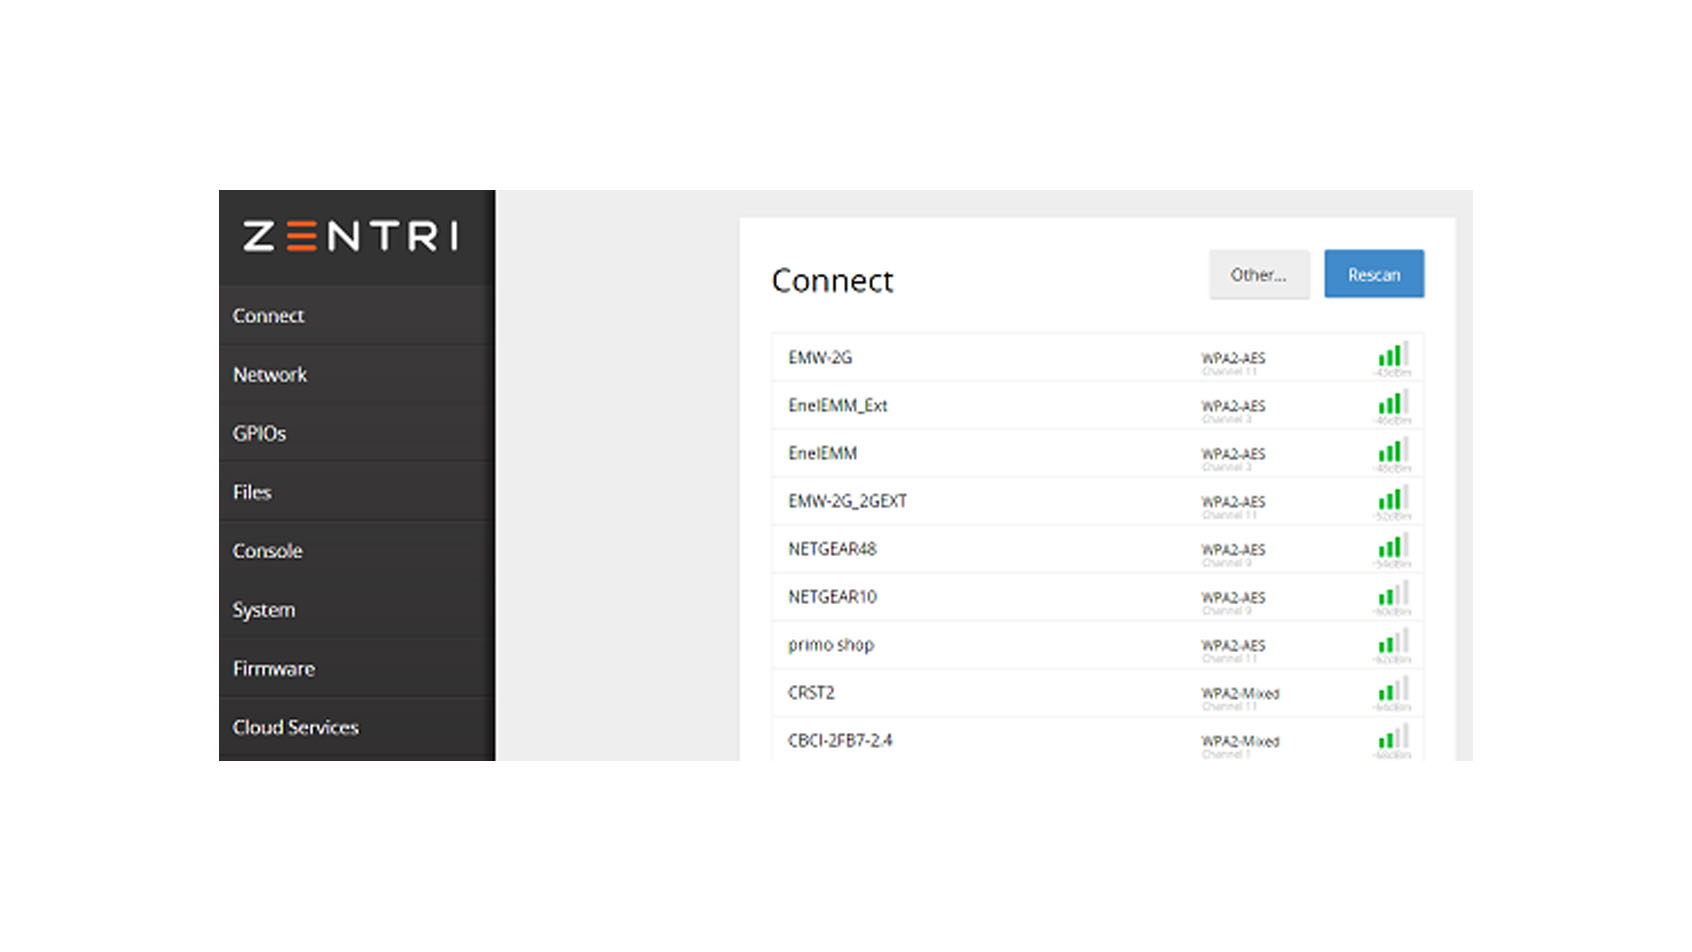
4. Select the desired WiFi network. Enter the WiFi network password, if necessary. Click Connect.
Verify that the Waybox is connected by checking that the "Network" indicator on the enclosure is solid blue.
NOTE: After connecting, Waybox checks its firmware version and performs any necessary updates. Wait 10 minutes before plugging in a vehicle.
Set Up JuiceNet Dashboard
- Log into the dashboard.
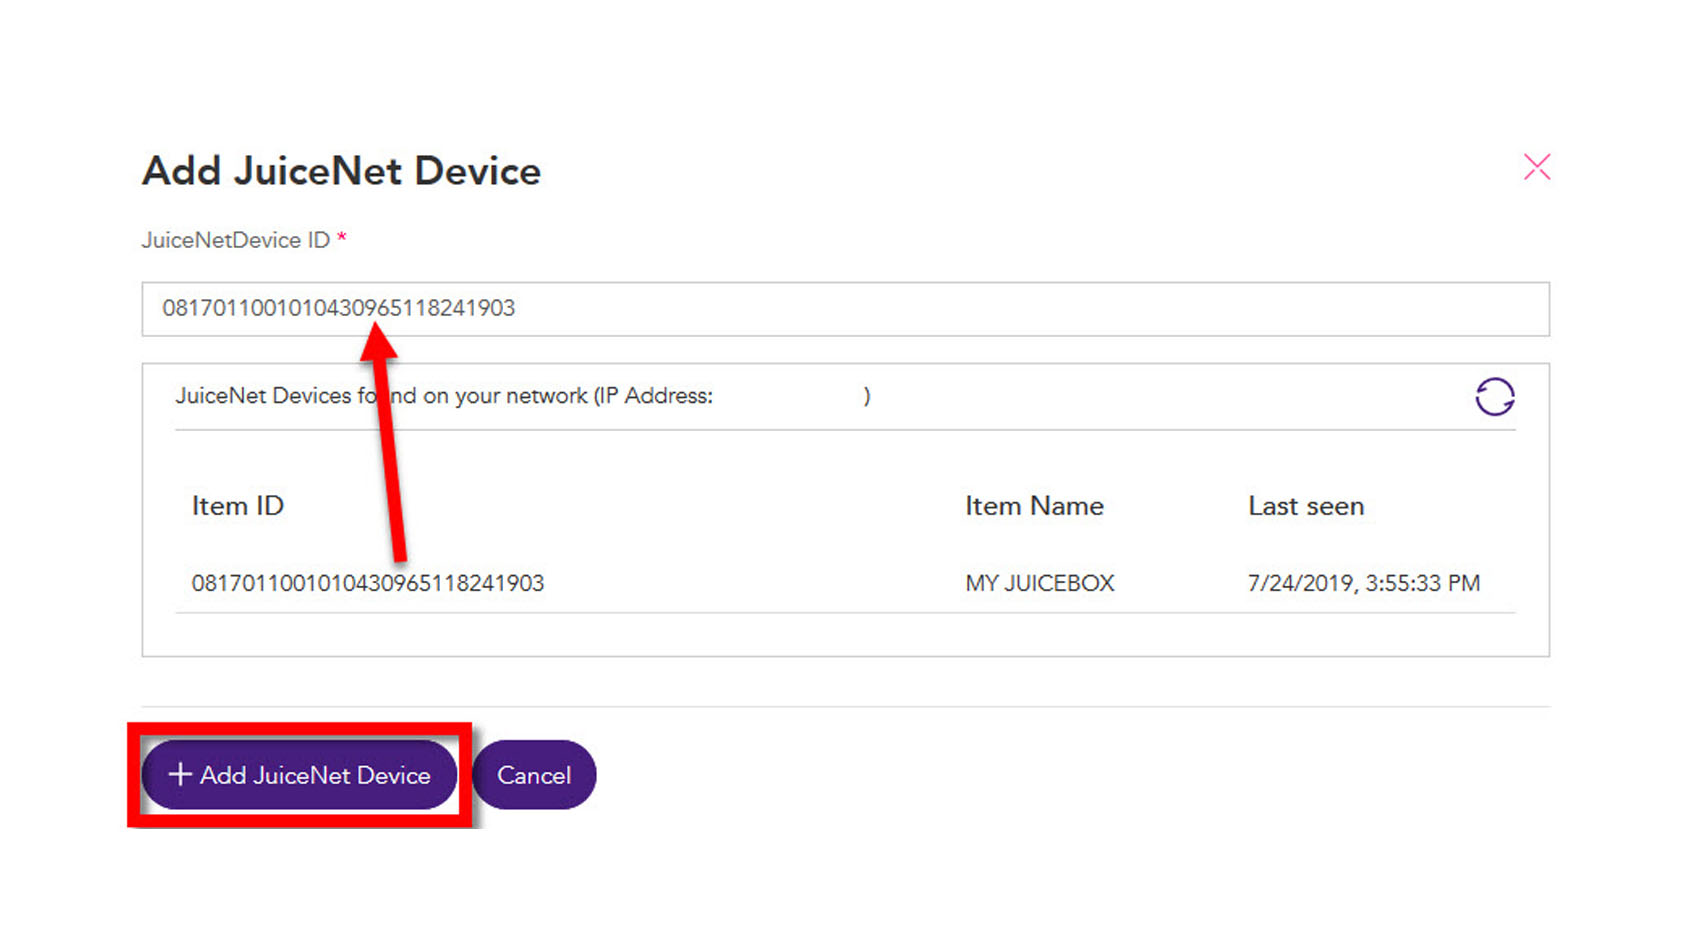
- Select Add JuiceNetDevice.

3. Enter the JuiceNet ID and select Add JuiceNet Device.
Tip: JuiceNet detects and displays all devices on the local network. Click on the appropriate Device ID to automatically paste it into the entry field.
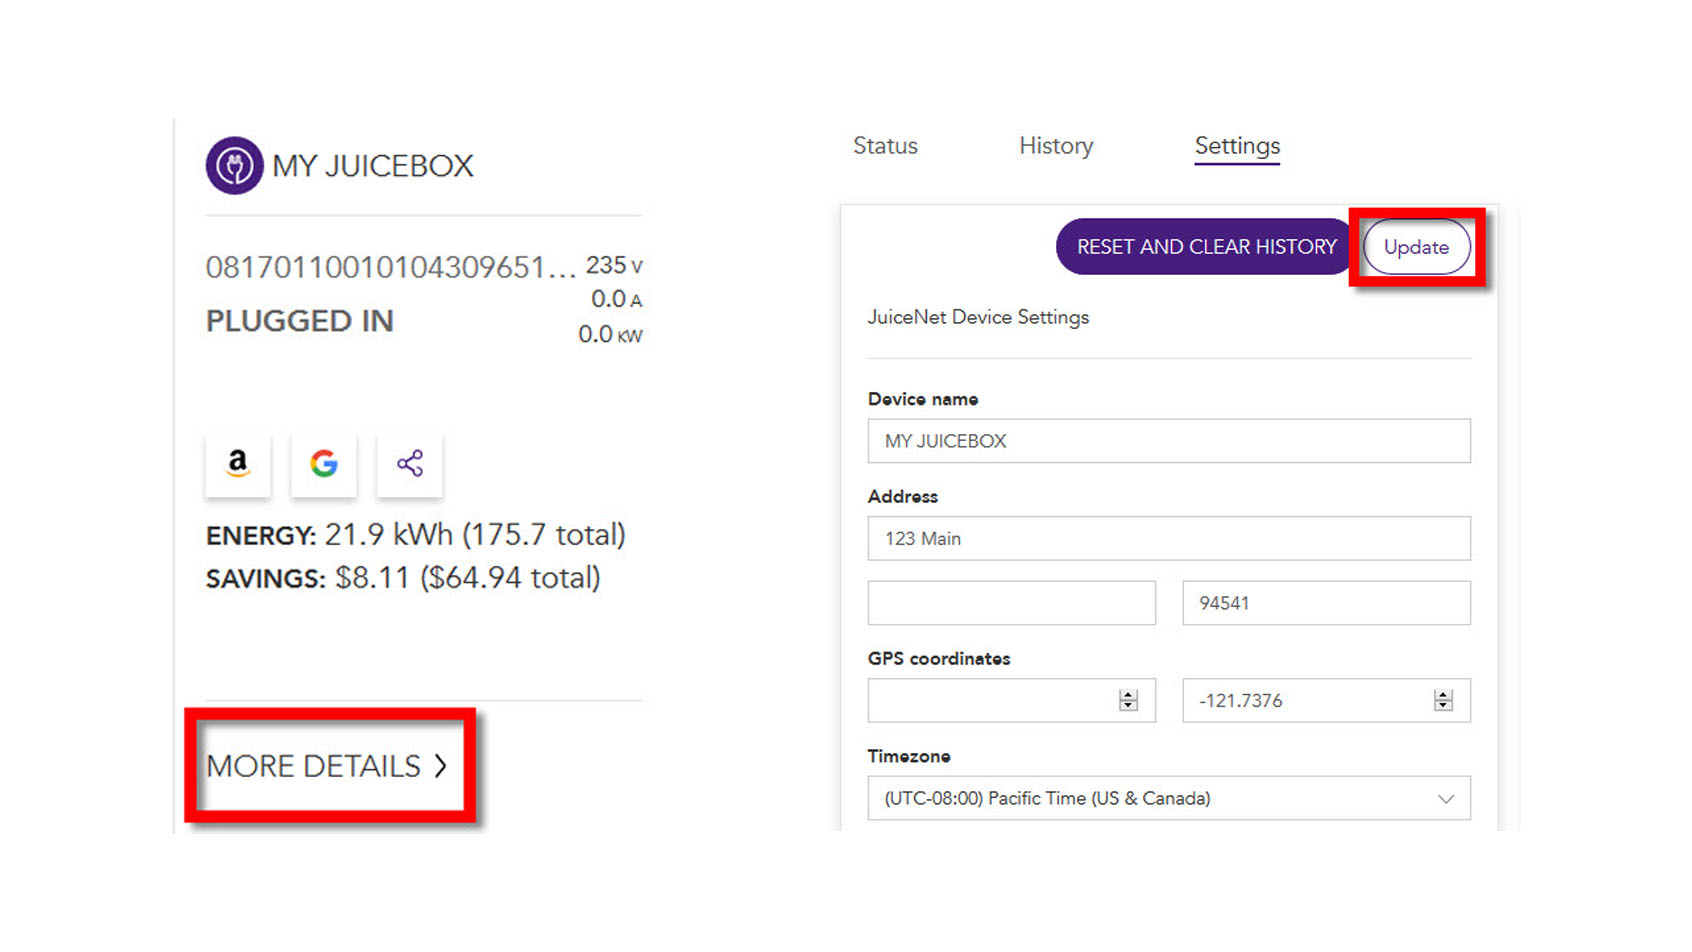
4. In the lefthand navigation menu, select My JuiceNet > My JuiceNet Devices.
5. Locate the appropriate device and select MORE DETAILS.
6. Select Settings.
7. Enter the device name, address, and timezone, then select Update.
Access a Waybox that is Already on the WiFi Network
Only perform these steps when the "Network" LED indicator on the Waybox is solid blue. If the network indicator is flashing, refer to WiFi Setup - Mobile Device.
- Install the JuiceNet app onto your mobile device.
- Log into the JuiceNet app. If you do not have an account, create one.
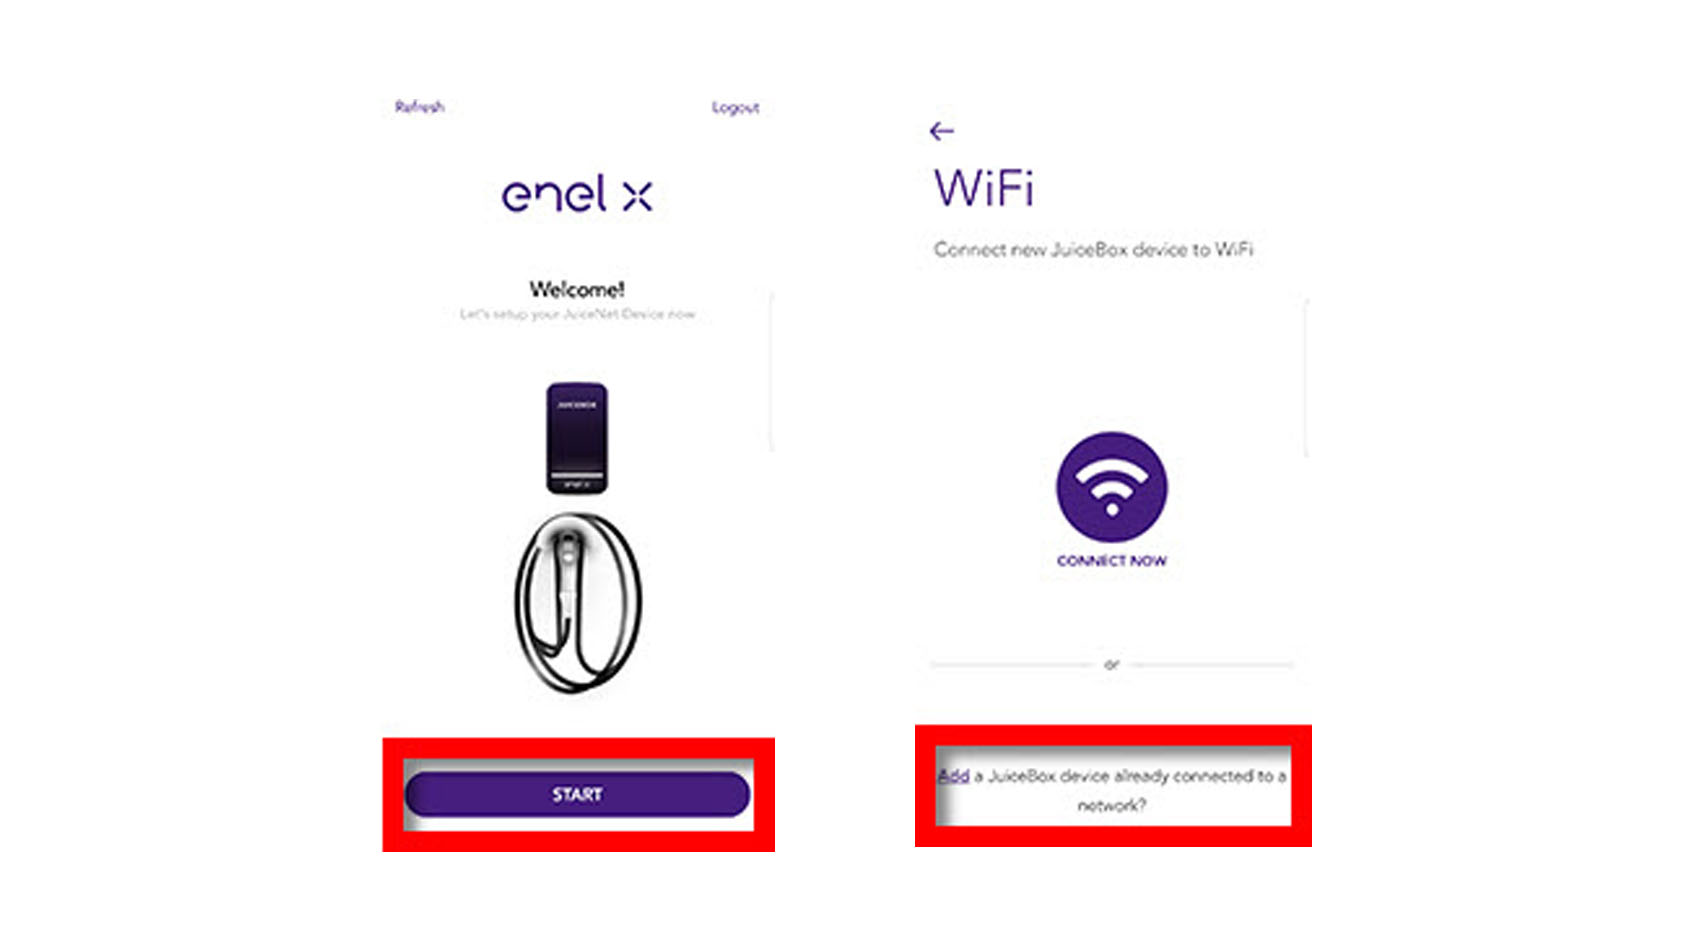
- Select Start.
- Select Add a JuiceNet device already connected to a Network.
5. Use one of the following options to find the connected Waybox:
- Select Scan the local network for JuiceNet devices, then select the Waybox correct device ID.
NOTE: In most cases, only one option is displayed.
- Select Scan JuiceNet device QR code, then take a picture of the QR code on the side of the Waybox enclosure.
If the Waybox is not found on your WiFi network, ensure that the Waybox is powered on, then repeat these steps. If the device is still not found, it is necessary to connect the Waybox to the WiFi network.
|
Power (Green)
|
Network (Blue)
|
Charging (Orange)
|
|---|---|---|
|
Solid: Unit is powered and ready
|
Solid: Connected to WiFi network
|
Solid: Charging
|
|
Off: Not powered or error
|
Slow flashing: Searching for configured network
|
Flashing: Time of use or delayed charging in effect
|
|
Flashing: Contact support
|
Rapid flashing: Setup mode
|
|
Audible Error Codes
If a system error occurs, the Waybox emits an audible sequence of tones that indicates its error state.
|
Tone Sequence
|
Error Description
|
Troubleshooting
|
|---|---|---|
|
Constant Tone
|
Earthing lost
|
Check the line and neutral connections as they may be reversed. Power cycle the Waybox. If the issue persists, contact Support.
|
|
Repeating tone with 1 second interval
|
Waybox system fail
|
Power cycle the Waybox. If the issue persists, contact Support.
|
|
Repeating 2 tones with 2 second interval
|
Vehicle not obeying charging cable
|
Power cycle the Waybox. If the issue persists, contact Support.
|
|
Repeating 3 tones with 2 second interval
|
Ground Fault Trip
|
Unplug the charging cable from the vehicle in order to reset the GFI trip count to 0. If the issue persists, contact Support.
|
|
Repeating 4 tones with 2 second interval
|
Overheating above 160° F (71° C)
|
Move Waybox to a cooler area, or out of direct sunlight. Remove any heating sources from the area. Waybox automatically resumes charging when the temperature is within operating limits.
|
|
Repeating 5 tones with 2 second interval
|
Relay Failure
|
Check your ground wire in both the panel and at the hardwired connection to make sure all connections are tight. If the error persists after power cycling the Waybox, and the vehicle does not charge, contact Support.
|